


The Fireplace.
We just bought a vacation house in the Poconos, in a cute private community right next to a lake. It’s not the beach house I always wanted, but it’s an escape from the city and it’s memories for my daughter to make, so I’m happy. It’s a gorgeous chalet style house that’s big enough for family to come over and spread out without being too crowded, unlike when they stay with us in my Irvington house that’s nearly 100 years old.
The only thing I don’t like about the house is that it’s stuck in the 80s. Pink and brass and light beige dominate the entire house.
I love a challenge and this is my ultimate arch nemesis. As much as I’d love to spend money on a new kitchen and bathroom, it’s just not possible. So me being thrifty and always coming up with new crafty ideas (Pinterest is my mistress), I’m tackling each room by hand and making my mark on it. Luckily, there are lots of easy do it yourself ideas out there. 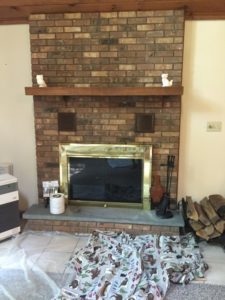
The first piece I tackled is the fireplace. It’s just plain old red brick. Don’t get me wrong, I love exposed brick! I feel it adds warmth to a house. I have it in my dining room in my Irvington house, but here it pretty much blends in with the wooden ceiling on the house and just looks downright blah. And since I’m not even touching the ceiling (that would be sacrilege), I figured I’d redo the bricks.
It’s a ridiculously easy job that will only take a few hours (depending on how large your fireplace is.)
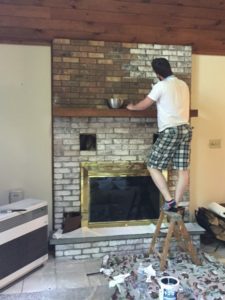
First, just lay down some plastic or tarp to cover the floor in case you make a mess. I used the shower curtain left by the previous owners. You can see how beautiful it is with moose and bears and pine trees all over it. I then found some white paint (any paint will do) in my basement left over (again) from the previous owners, and I watered it down about 50%. Depending on how much coverage you want, you can use more or less water, but I just wanted a light wash over the bricks. Mix it in a large bowl that you don’t really care about, and take an average flat paint brush and stipple it on over the bricks using a tapping motion. The bricks are pretty porous, and since it’s a light wash you will see most of their natural color underneath. Be sure to test it out on a portion of the fireplace you won’t really notice, just in case you don’t like it.
I don’t always follow my own advice and I just jumped right in. Luckily, it worked out to my advantage and it looked amazing.
1 brick down and 540 more to go.
It can be a bit tedious and you may be wondering if it will be worth it (it is!)
I started the bottom part and then, at the end, my husband decided to jump in and help out and did the top upper bricks for me.
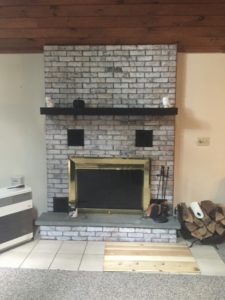
I couldn’t be happier with the end result and I love how each brick looks completely different!
We also painted the mantle as well. I was a little hesitant about that because, it was a beautiful red wood, but I just love the way the black stands out now. The next piece we still need to do is cover up the brass fire screen and it’ll be complete.
 I’ll keep you posted on that when it’s finally tackled!


