


My husband and I have lived in our home in Westchester for almost five years. It was built in 1928, and like many Westchester homes, our house is full of character and unique features. When we moved in, we had our priority list for what needed to get updated immediately. Unfortunately, our brown living room, pink (YES, PINK) foyer and brick fireplace with the cracked tiles were on the bottom of that list. Let’s be honest, a DIY limewash fireplace was the furthest thing from our minds.
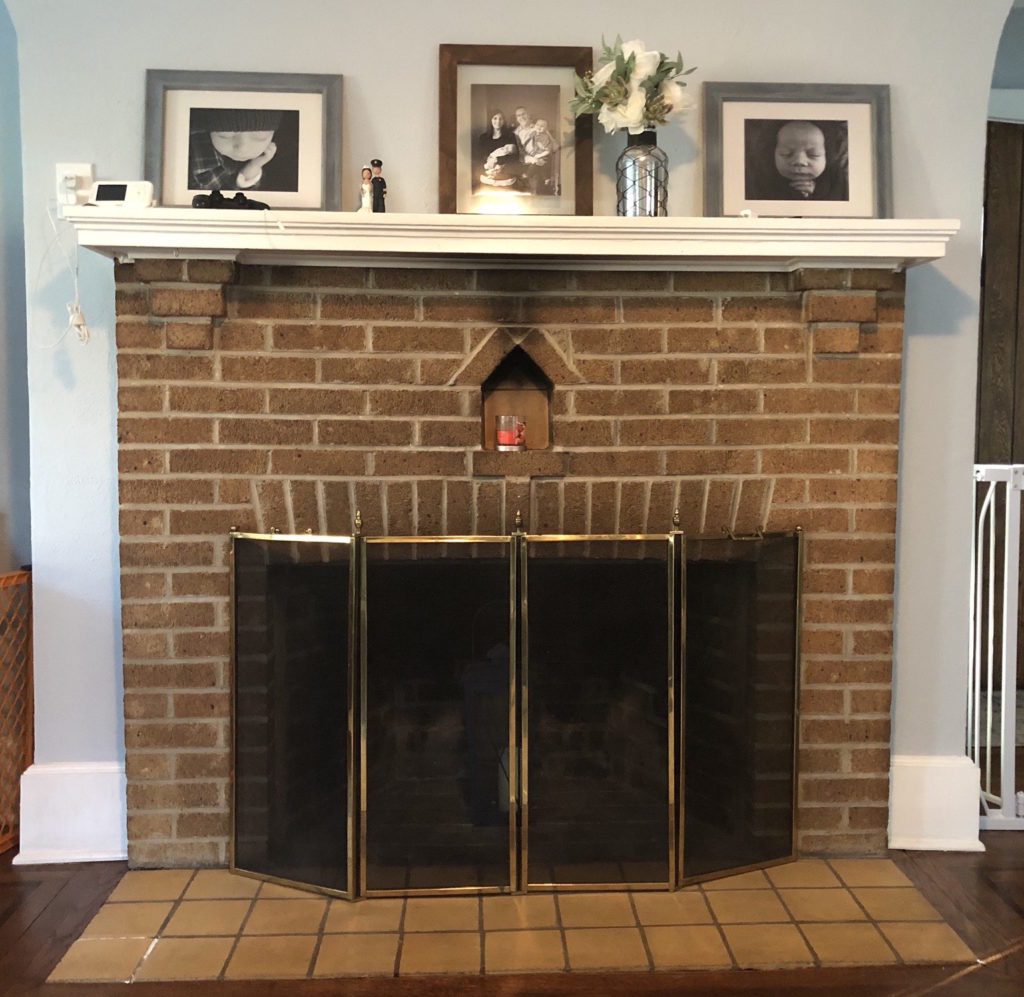
Fast forward to last summer, where I was finally able to convince my husband that the living room needed to be painted. The only thing was that the new paint job made that dirty brick fireplace with the cracked hearth stand out like a sore thumb.
As things tend to go, one thing led to another, and much to my husband’s dismay I persuaded him that we needed to swap out the cracked, yellow tile and paint the fireplace. So, off I went into the depths of the Internet, scouring Pinterest to figure out what I wanted my fireplace to look like and how to achieve that look. Much to my surprise, I discovered limewashed fireplaces are a thing, and limewashing was something I could easily do on my own!
Let me share with you what I did and how I transformed my filthy fireplace into the center attraction of our living room. All for under $60!
What is Limewashing?
Limewashing is a painting technique that uses a slaked lime and water mixture to create a chalky, weathered look compared to whitewashing. The great thing about limewashing is that you can rub away as much or as little as you like to create your desired look. Romabio Limewash (the brand I chose to use) even claims that you can completely rub the wash away within 72 hours if you are unhappy with the overall look. THAT is what sold me on limewash, especially since I was convinced I was going to ruin my fireplace. You can even watch Romabio’s limewash fireplace tutorial here.
Here’s What I Did
1. Gather Supplies! Most of the supplies I already had in my home so that kept costs under $60. (Minus the cost of the tile and labor).
- Romabio Limewash- I chose to go with the Bianco White, but you can choose from a variety of other shades too. I got this from Home Depot, $32.50 for one quart
- 2 Spray Bottles – Amazon, $8 for a pack of two
- Distilled Vinegar
- Painters Tape
- Painters Plastic
- Masonry Brush- The one I used was Warner, off Amazon for $15
- Scrub Brush
- Multi-Purpose Work Rags – Home Depot – Under $4
2. It’s ALL about that prep.
Lay down the plastic, cover any nearby furniture, tape off edges, and mix the Romabio limewash according to the instructions. I cannot stress this enough! Taking the time to do the prep work is KEY. Work then becomes more efficient, and cleanup is that much easier. I equate this to when you gather all of your baby’s bath time supplies before the actual bath part, so you aren’t yelling for your husband to run and grab the towel or lotion at the last minute.
3. Clean, clean, clean!
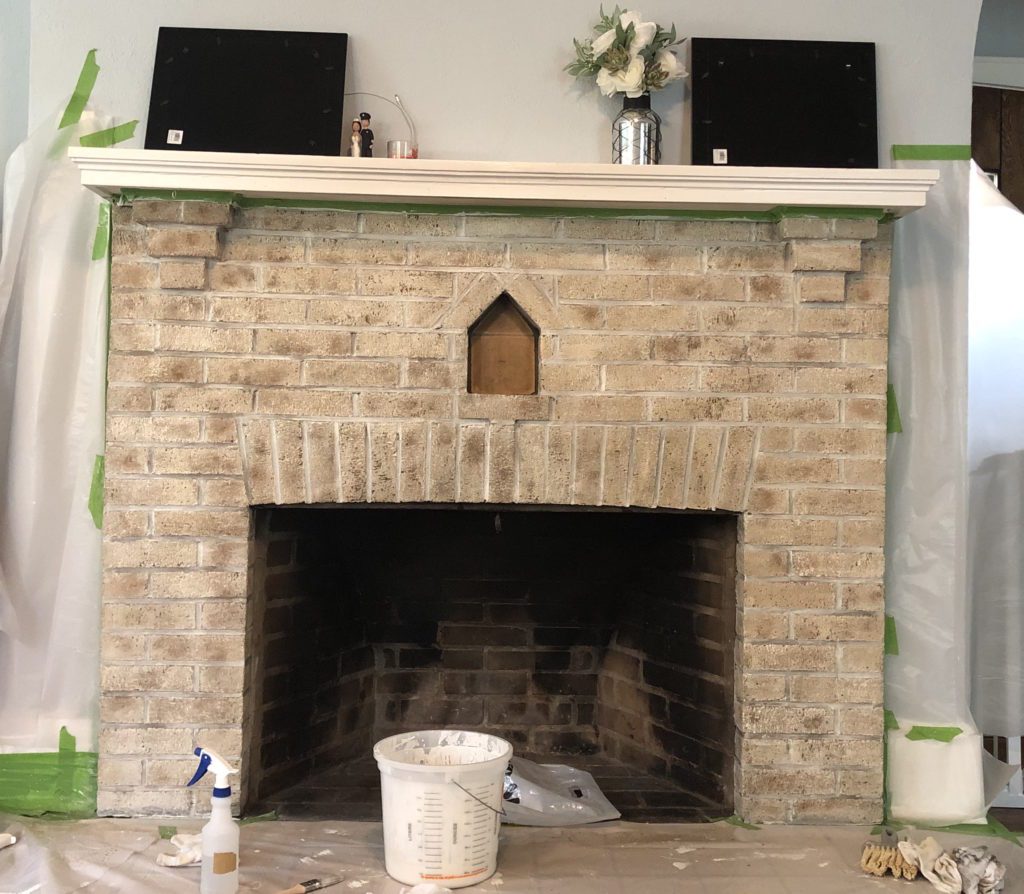
Mix 1 part vinegar and 1 part water into your first spray bottle. You want to spray down the brick with the mixture and take your scrub brush to remove the dirt and soot. You definitely need to put your muscles into this one, moms! And yes, this counts as the gym for the day! Cleaning is totally worth the effort because you certainly do not want to apply anything white on top of black soot.
4. Time to limewash.
After you are done cleaning, now you are ready for the fun! Spray the fireplace down with ONLY water using your second spray bottle. Taking your masonry brush, coat the brick in the limewash. Let the limewash sit for about 30 minutes until it is dry to the touch.
5. Distress away, my friends.
Taking your spray bottle of water again, go back and distress one brick at a time. You do this by spraying and rubbing as much or as little of the limewash away using your work rag. A brick here, a brick there. This is where you can let your creative mind flow and choose to blot away what you want to achieve your desired look.
FULL DISCLOSURE:
After I blotted the limewash away and let it dry for several hours, I realized I was not happy with how much brick had come through. I definitely over-blotted! To me, my fireplace actually looked orange, and I was not pleased. To remedy that, I simply repeated step 4 and gave my fireplace a second coat of the limewash. The second time around, I chose not to blot so much of the limewash away, and I was delighted with the results.
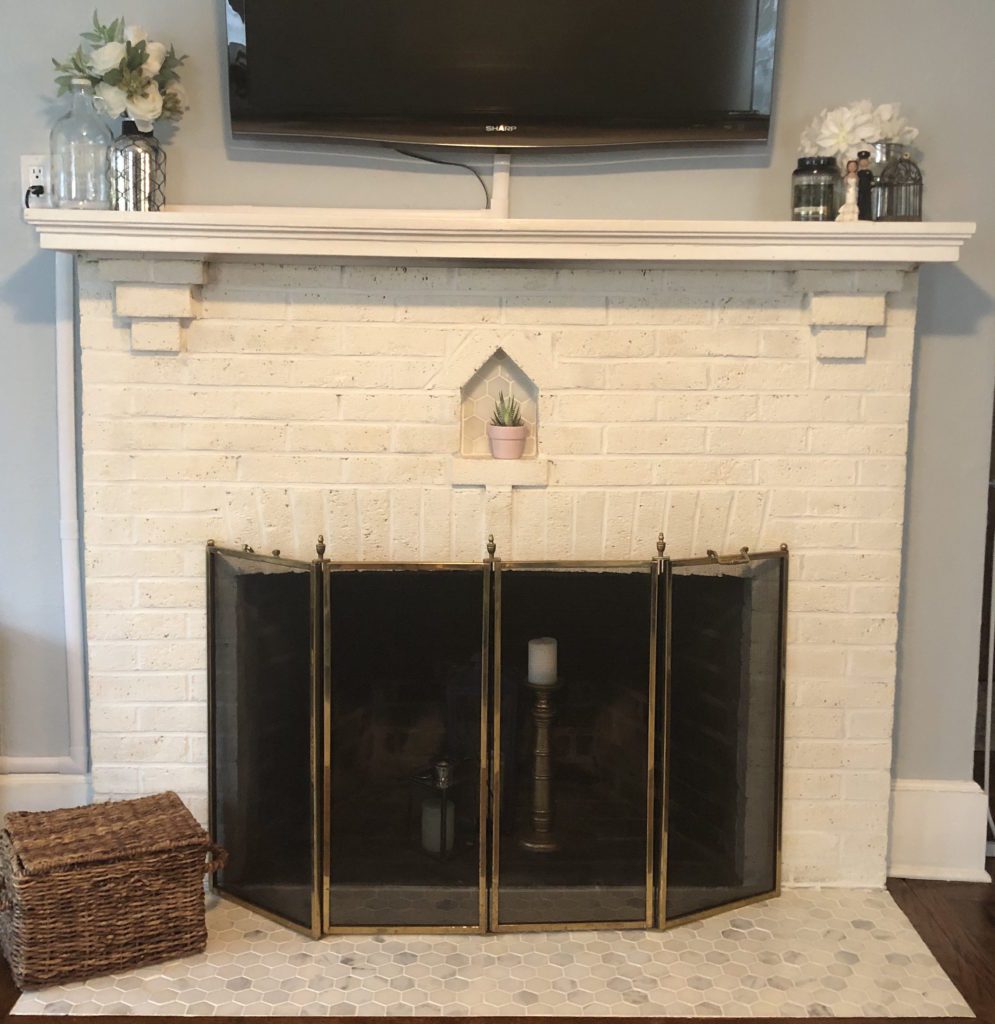
It was such a great feeling to transform my fireplace. It was just as satisfying as sneaking away to the hair salon for a well-deserved and overdue blowout! Our limewashed fireplace has really brightened up our living room, and it is always a good feeling when something comes out the way you envisioned. I think our houseguests agree that our fireplace looks up to date while still preserving the character of our 1928 Westchester home.
There was a tiny bit of a learning curve, but that’s part of the risk with anything DIY. I’m just glad I didn’t end up with one of those Pinterest fails! I hope this is helpful and I wish you all the best of luck in your DIY adventure. As always, if you have any questions regarding the limewash process, please comment below, and I’d be happy to help!


